
Introduction
In today’s fast-paced manufacturing world, plastic injection molding remains a cornerstone process, responsible for producing millions of everyday components — from car interiors and electronics casings to toys and medical devices. At the heart of this technology lies the injection mold, a precision-engineered tool that dictates product quality, production speed, and manufacturing cost.
Understanding the step-by-step process of plastic injection mold creation is essential for engineers, product designers, and entrepreneurs looking to bring a plastic product to life. This comprehensive guide unpacks each phase in detail, incorporating industry stats, expert insights, and best practices for mold success.
1. Product Design – Starting with the End in Mind
Before any Plastic injection mold design can begin, a detailed 3D CAD model of the final product is created. This design must:
- Include proper draft angles (typically 1°–2°) to ensure easy ejection
- Avoid undercuts unless absolutely necessary
- Maintain uniform wall thickness to prevent sink marks or warping
🧠 Insight: According to Autodesk, applying Design for Manufacturability (DFM) principles during early design stages can reduce injection mold costs by up to 45%.
2. Mold Material Selection – Matching Needs and Budget
The choice of mold material affects both cost and durability. Common materials include:
| Material | Uses | Durability | Typical Lifespan |
| Aluminum | Prototypes, short runs | Low | ~10,000 cycles |
| P20 Tool Steel | General production | Medium | ~100,000 cycles |
| H13 Steel | High-volume production | High | 1 million+ cycles |
📊 Stat: P20 steel molds account for over 65% of all molds used globally due to their balance of cost and performance.
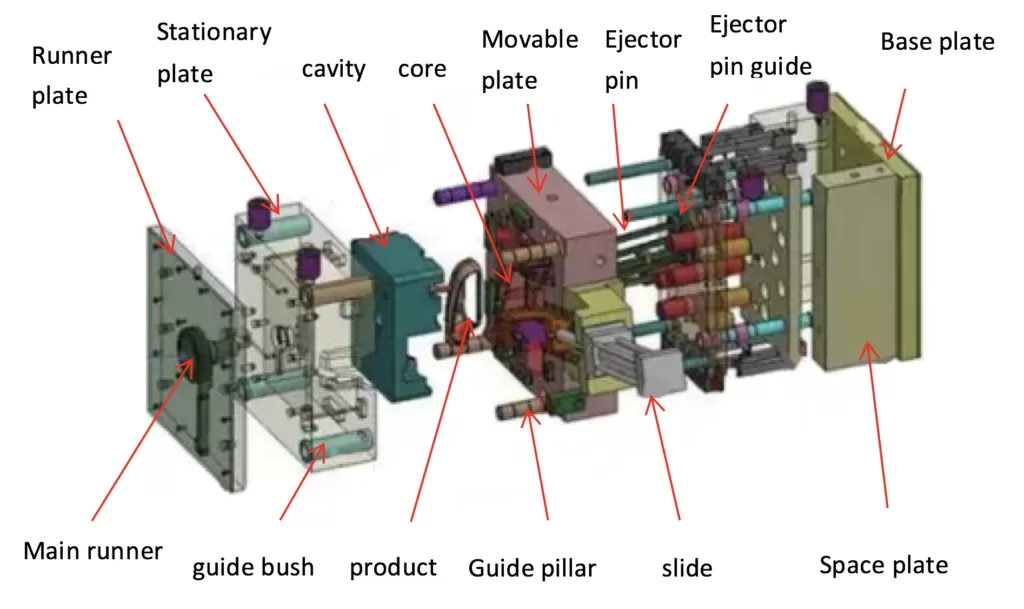
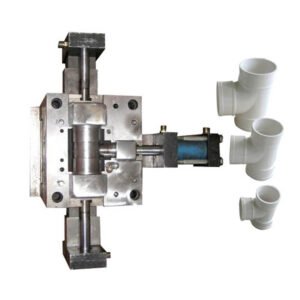
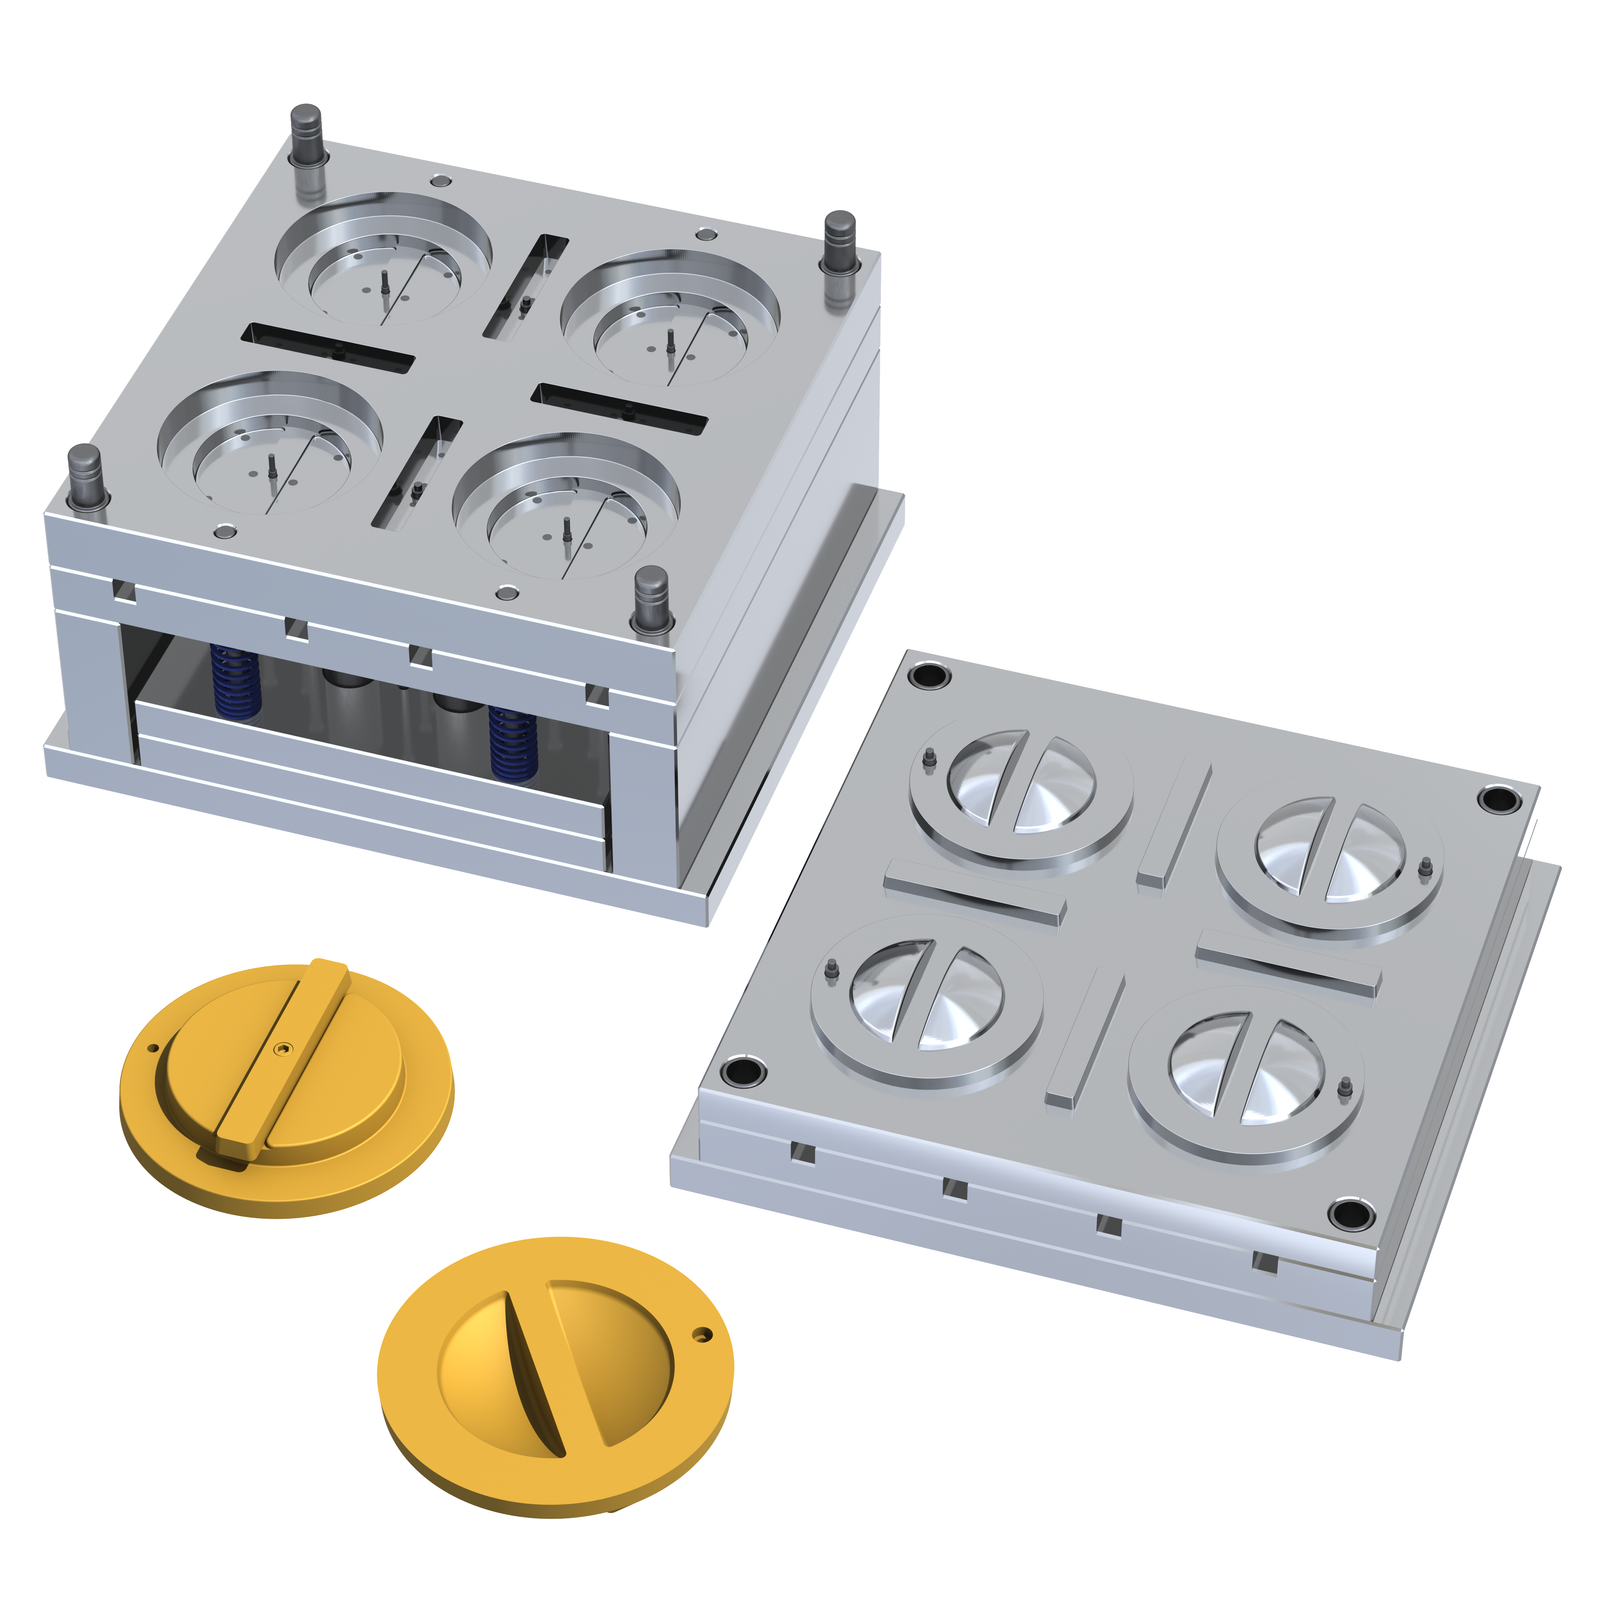
3. Mold Design – Planning Every Micron
Using tools like SolidWorks, NX, or Autodesk Moldflow, mold designers:
- Split the part into core and cavity
- Define gates, runners, and vents
- Integrate cooling systems to reduce cycle time
- Optimize ejection mechanisms
💡 Tip: Simulating the Plastic injection mold flow with Moldflow can identify over 80% of potential defects before any machining begins.
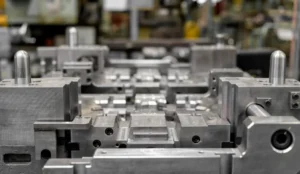
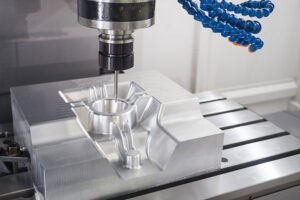
4. Mold Machining – From Design to Reality
Once approved, mold components are manufactured via:
A. CNC Machining
Used for rough and fine cutting with precision up to ±0.005 mm.
B. EDM (Electrical Discharge Machining)
Ideal for producing complex geometries, such as sharp corners or deep ribs.
Timeframe: CNC + EDM typically takes 2 to 8 weeks depending on complexity.
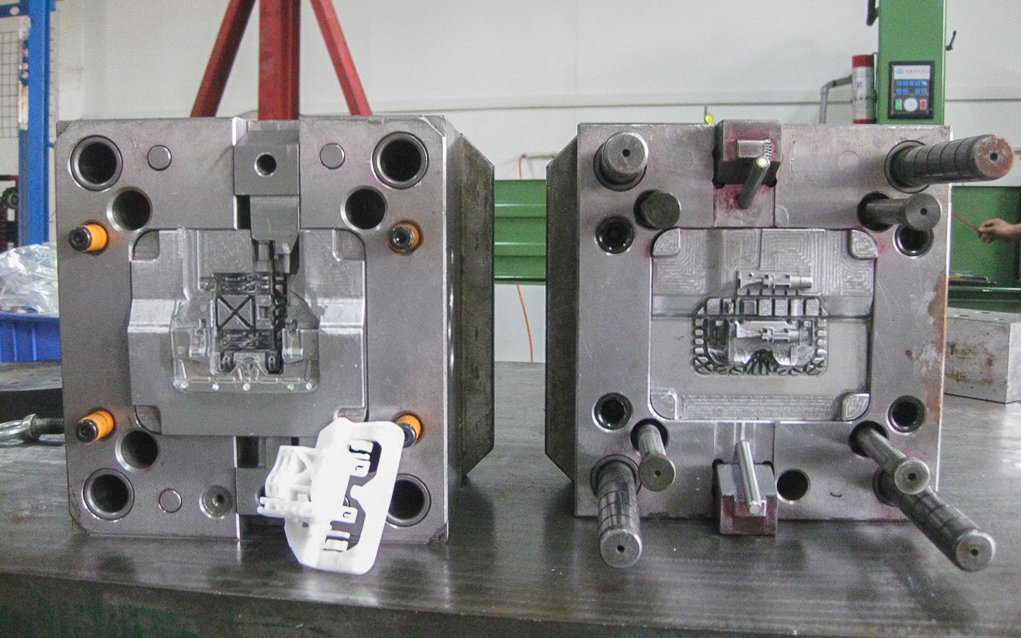
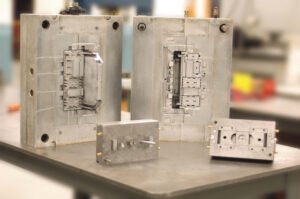
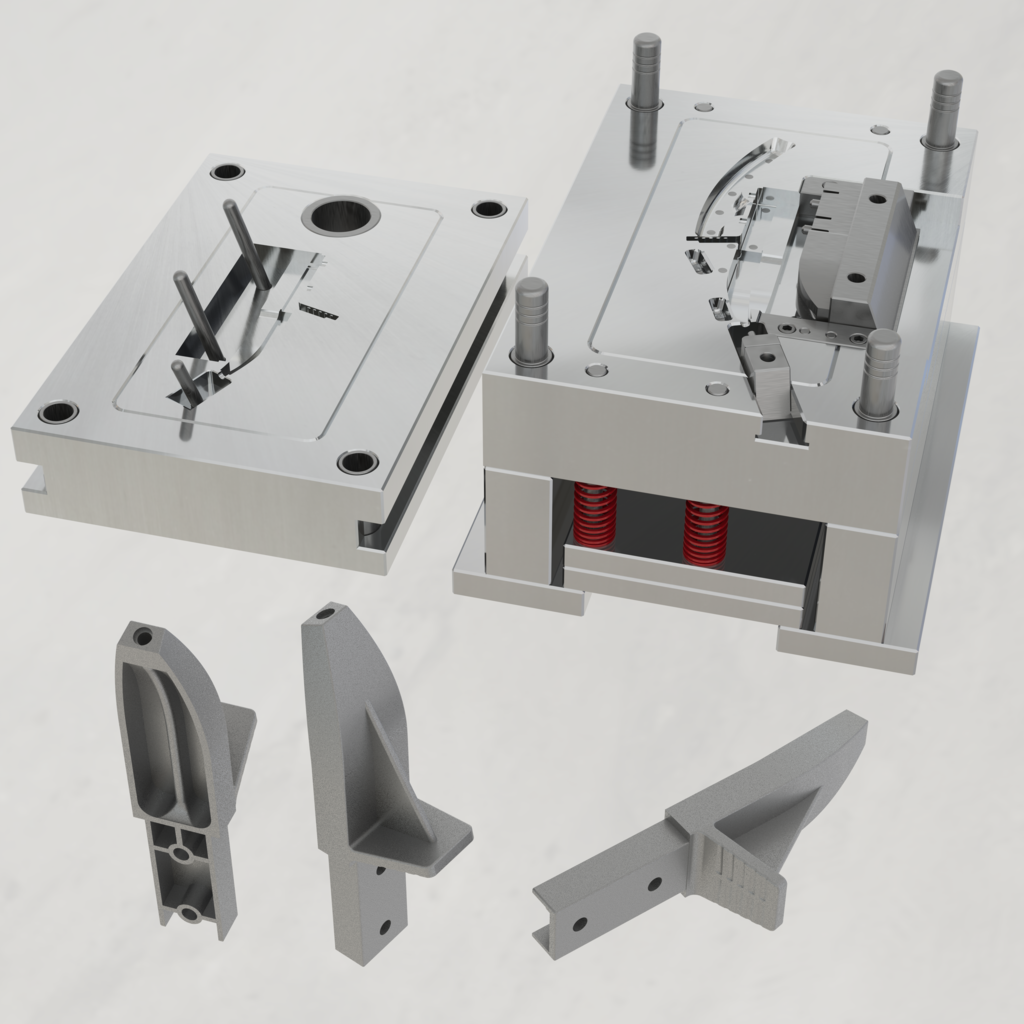
5. Mold Assembly – Precision at Every Connection

After machining:
- The core and cavity are precisely aligned
- Cooling lines, ejector pins, and guide bushings are installed
- The mold base is finalized and checked
Fact: Misalignment of even 0.01 mm can cause part flash, poor surface finish, or premature mold wear.
6. Mold Testing (T1 to Tn) – The Iteration Phase
The first Plastic injection mold trial (T1) is conducted on an injection molding machine. This phase assesses:
- Part dimension accuracy
- Warpage or shrinkage
- Surface finish and color matching
Multiple iterations (T1–T3) may be needed until the mold consistently produces acceptable parts.
Stat: On average, molds undergo 2.5 testing cycles before approval.
7. Final Adjustments and Mold Approval
After trials:
- Gates may be resized
- Venting can be optimized
- Textures or polish may be applied
- CMM (Coordinate Measuring Machine) is used for dimensional validation
Once approved, the mold enters production and is registered for lifecycle tracking.
8. Production and Maintenance – Keeping the Mold Healthy
During production:
- Regular lubrication of ejector pins and slides is critical
- Mold inspections are conducted every 50,000 cycles
- Preventive maintenance includes cleaning cooling lines and checking for corrosion
Pro Tip: A well-maintained H13 steel mold can last over 2 million cycles without degradation.
Frequently Asked Questions (FAQs)
1. How long does it take to create a plastic injection mold?
Typically, 4–12 weeks, depending on design complexity, number of cavities, and required precision.
2. What is the average cost of injection mold creation?
It ranges from $5,000 to $100,000+. Simple molds cost less, while complex or multi-cavity molds cost significantly more.
3. Can I use one mold for different parts?
No. Molds are custom-built for specific part geometries and cannot be reused across unrelated products.
4. What’s the typical lifespan of a plastic injection mold?
Depends on material:
- Aluminum: ~10,000 shots
- P20 Steel: 100,000–500,000
- H13 Steel: 1,000,000+
5. How do I ensure consistent mold quality?
Use flow simulation tools, conduct proper mold trials, and follow strict preventive maintenance schedules.
Sources
- Autodesk Moldflow Documentation
- Plastics Technology Magazine – Mold Making 2023 Trends
- SME.org – Tooling and Mold Design Best Practices
- Modern Machine Shop – Precision Machining for Mold Manufacturing
- InjectionMolding.com – Design for Manufacturability Guidelines
